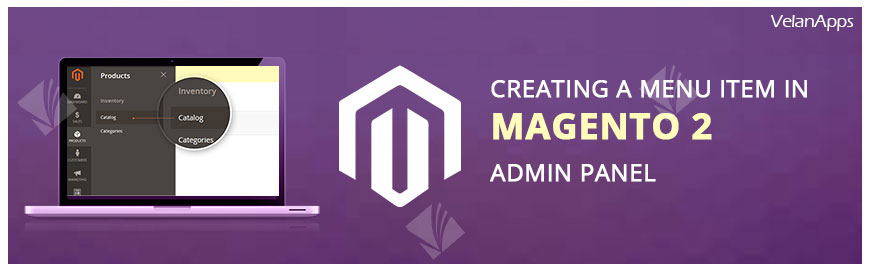
This is the first post in a series of tutorial posts wherein we’ll teach you to create a custom menu item in the Magento 2 admin panel – quick and easy!
Without further wait, let’s delve into the concepts of creating menu items in the admin panel. The scope of this post is to create Admin Panel Menu items. The controllers and action will be covered in the upcoming tutorials. So stay tuned 😉 we’ll be putting up those links right here!
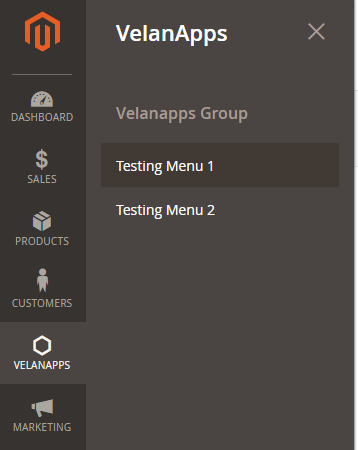
In this tutorial, you’ll create a create a custom menu item in the Magento 2 admin panel that looks like this:
Here’s How we did it
Kick-start a new Magento 2 module with the following files:
Path: app/code/Velanapps/Testing/registration.php
<?php
\Magento\Framework\Component\ComponentRegistrar::register( \Magento\Framework\Component\ComponentRegistrar::MODULE,
'Velanapps_Testing',
__DIR__ );
Path: app/code/Velanapps/Testing/etc/module.xml
<?xml version="1.0"?>
<config xmlns:xsi=http://www.w3.org/2001/XMLSchema-instance xsi:noNamespaceSchemaLocation="../../../../../lib/internal/Magento/Framework/Module/etc/module.xsd">
<module name="Velanapps_Testing'" setup_version="1.0.0">
</module>
</config>Now that we have our modules created. Let’s create our menu.xml file where we’ll be specifying the menu items that are required for our module:
Path: app/code/Velanapps/Testing/etc/adminhtml/menu.xml
<?xml version="1.0"?>
<config xmlns:xsi=http://www.w3.org/2001/XMLSchema-instance xsi:noNamespaceSchemaLocation="../../../Backend/etc/menu.xsd">
 <menu>
<add id="Velanapps_Testing::velanapps" title="VelanApps" module="Velanapps_Testing" sortOrder="30" resource="Velanapps_Testing::velanapps"/>
<add id="Velanapps_Testing::testing_group" title="Velanapps Group" module="Velanapps_Testing" sortOrder="10" parent="Velanapps_Testing::velanapps" resource="Velanapps_Testing::testing_group"/>
<add id="Velanapps_Testing::testing_menu1" title="Testing Menu 1" module="Velanapps_Testing" sortOrder="10" parent="Velanapps_Testing::testing_group" action="front_name/controller/action1" resource="Velanapps_Testing::testing_menu1"/>
<add id="Velanapps_Testing::testing_menu2" title="Testing Menu 2" module="Velanapps_Testing" sortOrder="10" parent="Velanapps_Testing::testing_group" action="front_name/controller/action1" resource="Velanapps_Testing::testing_menu2"/>
 </menu>
</config>
Note how “resource” from the top-level menu item becomes the parent value for the next level menu item. While using this code, make sure you replace the action attribute with the controller and action that needs to be opened when these menu items are clicked (or wait for our second post).
In our example, we have 3 primary nodes:
The first one being the Parent menu item and the last one being the Menu Items themselves (Testing Menu 1 and Testing Menu)
Our second node, is “VelanApps Group”, which is used to group the last-level menu items. You can have multiple groups in a single menu (you already knew that). Now, you know a simple way to create menus in Magento 2. Watch out for our step 2 tutorial wherein we’ll teach you about controllers and actions.
Did you try this? Did it work for you? Let us know in the comments. If you’re a developer experimenting with Magento 2 and this didn’t work for you, don’t sweat because we’d be glad to help you out!
That apart, if you’re trying to create your own Magento website and are trying to learn how to create menus in Magento 2, we don’t want to discourage you, but keep in mind that Magento experts help is just a click away. Just letting you know that we can handle this for you while you go sell! You play the game and we’ll set the field. Contact Us or Call us @ +1 516 717 2049.